



Auto Publish WordPress Posts with Category, Tags, URL and Immediate Publishing
To auto publish WordPress posts means that an article goes live on your site the moment its turn comes, with no draft stage and no final click from you. The tool behind this sends each text with its category, tags and address straight to the blog and marks it as published. It fits owners who trust their texts and prefer to set the conditions once. The process stays simple: a folder goes in, posts come out, at a pace you choose.

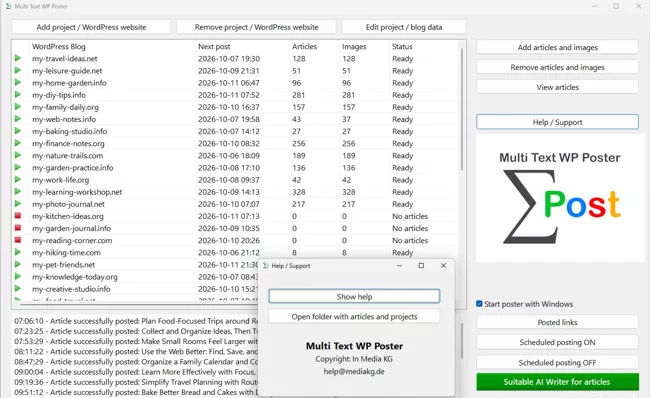
When you auto publish WordPress posts, each post consists of more than title and text. To appear in the right place on the site, it needs a category, fitting tags and a sensible address. If you leave that to chance, you end up with a blog where everything lands under "Uncategorized" and the addresses consist of entire sentence fragments. This article is about how to control these details when you auto publish WordPress posts, and when the immediate post is worthwhile.
Which Details Go Along When You Auto Publish WordPress Posts
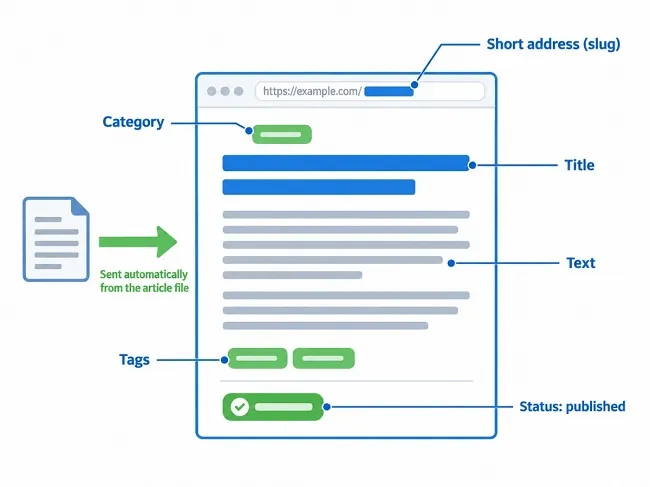
When you auto publish WordPress posts, the program sends up to three further details from the article file to your site, besides title and text: the category, the tags and the desired short address of the post. All three are optional. If one is missing, WordPress uses its own defaults, without an error message.
When you auto publish WordPress posts, the status passed along is always "published". A post therefore appears immediately when its date is reached, and not first as a draft. The author is the user whose credentials are stored in the project. The publication date is the moment of posting; a backdated post or one set in the future is not provided for.
The three details differ in their effect. The category places the post in the structure of your site and decides in which area readers find it. Tags link it thematically to other posts. The short address determines the web address under which it can be reached later. All three can be set individually per article when you auto publish WordPress posts, so every text gets its proper place. The following sections go through them one after another, followed by the immediate post.
Loading and Assigning Categories
To auto publish WordPress posts into the right category, note that WordPress manages categories as numbers. So that you do not have to guess, the program fetches the list directly from your site. The way there leads through the import dialog:
- Select the project and open "Add articles and images".
- Read in the articles you want.
- Click "Load categories". The program logs in to the site with the project's credentials.
- Choose the matching category in the selection list.
- Select one or more articles in the list and click "Set category for selected".
The selection list shows each category with number, name and short name, for example "14 – Garden care (garden-care)". The first entry reads "0 (WP Default)". In the article list you then see in the Category column what has been assigned. When the articles are added to the project, the number is written into the article file.
If loading fails, the program names the reason. If the address, the user or the application password is missing in the project, a corresponding notice appears. If the site does not respond within 90 seconds, the message is "Website not reachable!" with the request to check your internet connection, WordPress URL, WordPress user and application password.
What Happens without a Category
If you auto publish WordPress posts without a category, you still get a cleanly published post. The program treats every missing, invalid or negative value like "0". With 0, no category is passed to WordPress at all, and WordPress then uses the configured default category. No error arises; the post goes out completely normally.
Which category that is you set in WordPress itself, in the settings under "Writing" at the default post category. Out of the box it is usually called "Uncategorized". If you publish many articles without assignment, check this setting beforehand and change it to a sensible category if needed. Otherwise dozens of posts pile up in an area whose name says nothing about the content.
An advantage of this behavior: you can start to auto publish WordPress posts without first building a category structure and catch up on the assignment later. Posts that are already published can be moved in WordPress at any time. For articles in the stock, the route via the import is preferable, because you set the number there once and do not have to do anything afterwards.
Planning Categories Sensibly
A sound structure for anyone who wants to auto publish WordPress posts arises before the import, not after. If you auto publish WordPress posts, keep the number of categories manageable; five to ten main topics are enough for most blogs. A post belongs in exactly one category. If you want to assign it to several, you blur the structure, and the program provides only one number per article anyway. Tags are there for finer distinctions.
Also note, when you auto publish WordPress posts to several sites, that the numbers differ from site to site. Category 14 on blog A is something completely different on blog B or does not exist at all. Texts that you move between projects therefore need a new assignment. If a category is later deleted or replaced in WordPress, articles in the stock may point to a number that no longer exists. In such cases, check the affected articles before their turn comes.
Naming deserves some thought as well when you auto publish WordPress posts. Category names appear in the menu and above the posts, so readers see them constantly. Short, clear terms such as "Garden care" or "Tools" work better than catch-all terms such as "Miscellaneous". A category that contains only one or two posts also looks thin. Create new categories only when a handful of fitting articles is emerging in the stock.
Tags That Are Few but Accurate
The tags stand in the TAGS section of the article, separated by commas. Each of them is passed to WordPress as an individual tag. Spaces around the commas do no harm, and empty entries are skipped. The whole section may be missing, in which case the post appears without tags.
When you auto publish WordPress posts and choose tags, the rule is: tags should connect posts, not merely describe them. A term carried by a single post creates a page with exactly one entry and helps nobody. Terms under which several posts can be gathered make sense. Three to five per article are enough. Write them consistently: if you use "balcony plant" one time and "balcony plants" another, you get two separate tag pages with few posts each. Decide once on one form and stick with it.
Also, when you auto publish WordPress posts, avoid repeating the name of the category as a tag. It is already covered there, and the double layer adds no value. Since the first tag also shapes the image file name, it should hit the core topic of the article as well.
The Short Address of the Post
The URL section determines the last part of the post address, the so-called slug. If it is missing, WordPress forms it from the title itself. That works, but with long titles it leads to long addresses with filler words. Anyone who sets the slug themselves keeps the address short and meaningful when they auto publish WordPress posts.
| Title | Unfavorable slug | Better slug |
|---|---|---|
| How do I plant my balcony correctly in spring? | how-do-i-plant-my-balcony-correctly-in-spring | balcony-planting |
| The 10 best herbs for the windowsill | the-10-best-herbs-for-the-windowsill | windowsill-herbs |
To auto publish WordPress posts with clean addresses, stick to lower case letters and hyphens, and avoid special characters. Include the central search term, leave out filler words, and stay under five words. Years belong in the address only if the post is really replaced every year, otherwise the address visibly ages. A slug that has been published once should not be changed any more, because otherwise the old address leads nowhere.
Two more points help in everyday work when you auto publish WordPress posts. Assign each slug only once per site, because with duplicate addresses WordPress automatically appends a number, and the address becomes uglier than necessary. And set the slug right when writing the articles instead of adding it later: it is one of the details that can be checked at a glance in the stock but corrected in a published post only with effort.
The Immediate Post for Publishing One Text on the Spot
When you auto publish WordPress posts, the schedule normally decides when a post appears. For exceptions in the way you auto publish WordPress posts, there is the immediate post. It is available when you insert a single article in the import dialog via "Add single article". After that the button "Post article now?" appears. It suits posts that should not wait, or a first test where you want to see the result on the site right away.
After the click, the program asks whether the article should be published now and points out that the normal schedule remains unchanged. If you confirm, it adds the article including category and images to the project and publishes it immediately. A success message follows, and the button disappears until you insert the next single article. If there is an error, the message names the reason, such as incorrect credentials or a site that cannot be reached.
The schedule for the remaining articles stays untouched. An immediate post therefore neither shifts the next date nor uses up a place in the order. It is an individual case, not a replacement for the way you auto publish WordPress posts by schedule. For whole deliveries the route via the stock is the better way to auto publish WordPress posts, because only it distributes the posts evenly.